Overview
In this article I show how to produce a Certificate Request using the management console with the Certificates snap-in. After importing the certificate in the computer container.
In this case I am generating a digital certificate that will be installed at 2010 TMG that it is configured as Reverse Proxy Server Lync pool. The enterprise certification service is installed along with the domain controller with the service and this Web Enrrolement active.
The certificate will be generated with multiple Destinguish Name and Subject Alternative Names.
Connection Manager Certificate
Start running on the machine and run the mmc to start the management console, click File and Add / Remove Snap-in

Select the Certificate Snap-in and add to the console


Select Computer Account to manage the certificates installed on computed
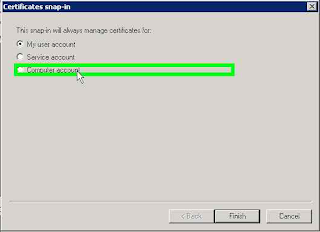
Select Local Computer and finish the wizard


Request Certificate
Expand the Personal folder in the Certificates. Right-click All Tasks, select Advanced Operations and Create Custom Request ....


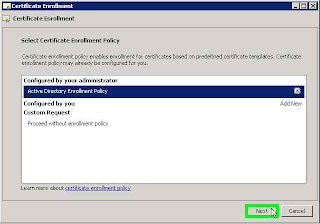
Select the Enrollment Policy


Tab Certificeta Properties in select Subject Name option Type: Common Name and Value set the FQDN of the primary service that uses the certificate. In part of Alternative Name select Typer: DNS and add all the FQDN's that bear the certificate


Generate the Certificate
Access the address of the Web Enrollment of digital certification in the URL https:// <FQDN server certificado> / CertSrv and click Request Certificate


Import Certificate
Return to the management console expand the Personal Right click on Certificates select All Tasks and click Import ...


No comments:
Post a Comment